Mac OS에서 nginx 구동 관련 포스팅
https://chance-story.tistory.com/12
Mac 환경에서 nginx 실행하기
nginx란 - HTTP 기반의 서버를 생성하는 소프트웨어 - 웹 서버를 생성 및 정적 웹페이지 호스팅 - Event-Driven 구조로 동작한다 (고정된 프로세스 사용) - 적은 자원으로 효율적인 운용이 가능하다는 장
chance-story.tistory.com
목표
나의 컴퓨터를 리버스 프록시 서버로 만들어 보고자 한다.
클라이언트 : postman
프록시 서버 : nginx
원 서버 : 미리 구축해놓은 서버 사용
실습
1. Mac OS 기준 /opt/homebrew/etc/nginx/nginx.conf 파일 내 프록시 서버 구축
server {
listen 10027; // 프록시 서버 포트번호
server_name localhost;
#charset koi8-r;
#access_log logs/host.access.log main;
location / {
# root html;
proxy_pass http://<구축해둔 서버 ip>; // 클라이언트의 정보를 송수신할 원 서버 작성
proxy_set_header myname devops03-heechanan;
}
...아래 소스 생략
아래 nginx proxy 서버 공식문서 참고
https://docs.nginx.com/nginx/admin-guide/web-server/reverse-proxy/
NGINX Reverse Proxy | NGINX Plus
NGINX Reverse Proxy Configure NGINX as a reverse proxy for HTTP and other protocols, with support for modifying request headers and fine-tuned buffering of responses. This article describes the basic configuration of a proxy server. You will learn how to p
docs.nginx.com
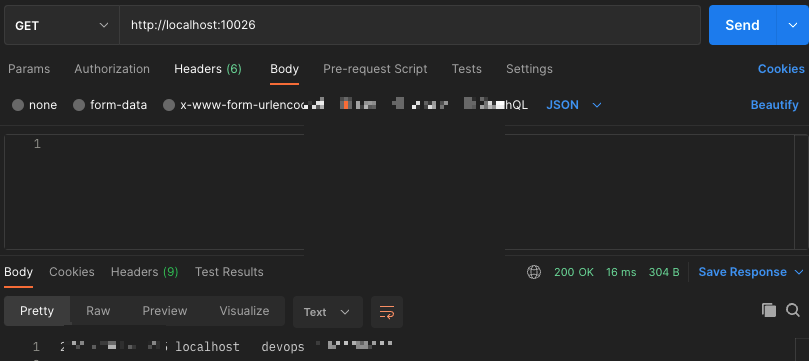
2. postman(client) 을 사용하여 프록시를 통한 원서버 데이터 송수신 확인

=> 아래 모자이크 부분 확인 (원서버에서 제공하는 정상적인 데이터 확인 함)
3. 프록시 헤더가 원서버에 전달해야 하는 요청 헤더값 작성
=> location 구역 내 아래 사진과 같이 poxy_set_header 값 작성
Host $host // 요청이 들어 왔을 때의 호스트 명
X-Real-IP $remote_addr // 요청한 클라이언트 주소를 헤더에 입혀서 전송
mydata // mydata 헤더에 client_send_data 데이터를 입혀서 전송 (미리 구축한 서버에서 수신할 데이터)
4. 프록시 서버 캐싱 기능 추가
nginx caching 공식 문서와 nginx caching guide 를 참고하여 캐싱 기능 추가
- nginx caching 공식문서 링크
https://docs.nginx.com/nginx/admin-guide/content-cache/content-caching/
NGINX Content Caching | NGINX Plus
NGINX Content Caching Cache both static and dynamic content from your proxied web and application servers, to speed delivery to clients and reduce the load on the servers. Overview When caching is enabled, NGINX Plus saves responses in a disk cache and use
docs.nginx.com
- nginx caching guide 문서 링크
https://www.nginx.com/blog/nginx-caching-guide/
A Guide to Caching with NGINX and NGINX Plus - NGINX
Performance is critical to success, and caching is one basic tool for improving it. Learn all about caching with NGINX and NGINX Plus.
www.nginx.com
- http 블록 내 proxy_cache_path 추가
keys_zone = 공유 메모리 영역 설정 5m=5MB로 약 40,000개의 키에 대한 데이터 저장이 가능하다.
- location 블록 내 cache 옵션 추가
proxy_cache = 캐시 영역 이름
proxy_cache_methods = 사용 가능한 메소드
proxy_cache_valid 200 5s = 200 응답에 대해 5초 동안의 캐싱 설정
add_header X-cache-Status $upstream_cache_status
= 클라이언트에 대한 응답으로 HTTP 헤더 추가
$upstream_cache_status // MISS, EXPIRED,HIT 등의 응답 가능
add_header Cache-Control "public" = 응답이 공유 캐시에 저장되도록 함
5. 클라이언트 - 프록시 - 원서버 동작 확인
- /opt/homebrew/etc/nginx/nginx.conf 파일 수정 완료 후 nginx 재실행
=> sudo nginx -s reload // nginx 재실행
=> sudo nginx // nginx 실행 (실행되고있을때는 reload 사용)
=> sudo nginx -s stop // nginx 중지
=> brew services list 를 통한 nginx 실행 확인
- 수신 바디에서 원하는 데이터 출력 확인
오류
- 브라우져로 데이터 값을 받고자 하였지만 계속해서 데이터가 도큐먼트 파일로 다운로드가 됨
*해결 : location 구역 내 proxy_hide_header Content-Type; 추가 작성
=> nginx 는 기본적으로 proxy 반환 헤더의 Content-Type 를 그대로 사용한다.
proxy에서 넘어오는 Content-Type 을 무시하기 위해 proxy_hide_header Content-Type; 추가
- 송신 데이터를 수정했음에도 이전 데이터가 날아감
=> 포트번호를 바꿔서 하면 정상 동작함
=> 기존 포트를 닫고 다시 열면 정상 동작함
=> 원인 잘 모르겠음
'DevOps > DevOps' 카테고리의 다른 글
| API 디자인, 프로세스 간 통신(Inter-process communication, IPC ,마이크로서비스 간의 통신) (1) | 2023.02.01 |
|---|---|
| 마이크로서비스 란? (구조 및 특징, 아키텍처 구현, 서버리스) (2) | 2023.01.30 |
| MLOps 란? (DevOps 와 비교) (0) | 2022.12.21 |
| ETL 과 ELT (0) | 2022.12.21 |
| 데이터 파이프 라인 (0) | 2022.12.21 |